ShopDreamUp AI ArtDreamUp
Deviation Actions

Tools that you will need...
- Blender
- After Effect / Photoshop
- Gimp
- VTFedit
Side note, Blaze model will be used for this tutorial but obviously this trick work for every model.
1- Load your model in Blender, once loaded, select your whole model then duplicate it ("CTRL + D" by default), hide the original body by clicking on the little "eye" on your object panel on the right (this will make the original model unselectable and so avoid some error from you during your work, you will not need the original body during the whole process), select the copied body then split your model per loose part (key "P" in edit mode by default).

2- You might need to merge back some part of the copied body, for exemple in the case of Blaze, her fur wrists is made of several mesh part, merge them back BUT only the part from the same area (do not merge back the left wrists with the right wrists for example).
In the idea, each limb part have to be an unique object (left hand, righ hand, left leg, right leg...), you might need to do a more precise split in some case (split the left and righ leg) do it if needed (edit mode then "B" key to select the mesh to split, once selected, "P" and "split per selection").
3- Once each limb are correctly splitted, you will need to reassign their origine point to their geometry, to do so, select the body part then "SHIFT + CTRL + Alt + C" and select "Origin to Geometry".

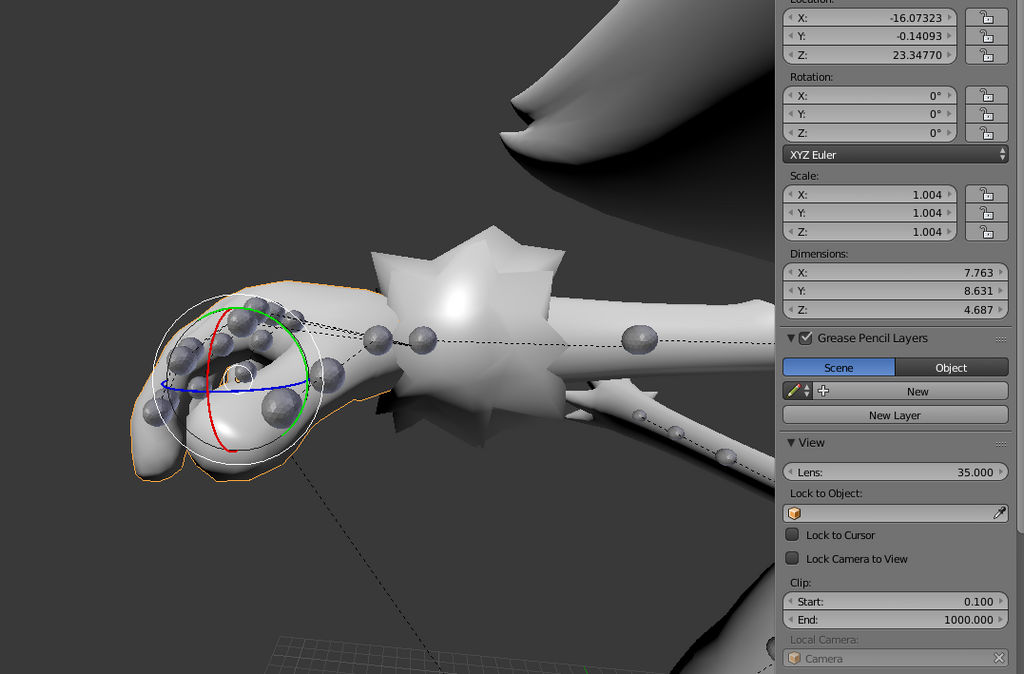
4- Now you have to scale up each body part (in object mode, key "S" by default), the goal is to have the copied body part just a few centimeter bigger than the original body part, you can extand the right panel to help you.

As you can see in that case the hand has been scaled to +0.004 only, it's usualy enough.
Now I think you can guess what is the purpose of this...
Yes, the "copied body" will be the surface on which this aura effect will be applied !
5- Merge back together all the copied body part (DO NOT MERGE WITH THE ORIGINAL BODY), also delete the copied body part on which you do not want this effect (like the eyes).
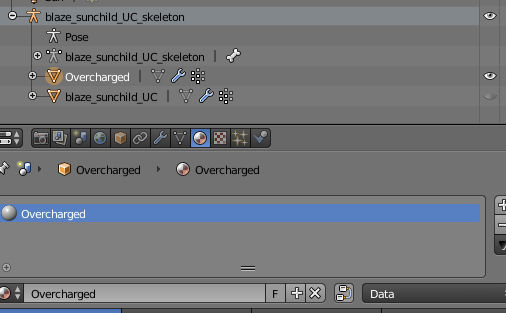
Delete all the material used by the copied body part and add a new material (name it as you want, just keep in mind that your VMT will have to have the same name).

6- Finaly, export the copied body part as SMD, then recompile your original model by including the new SMD which contain the copied body part as "bodygroup".
Don't forget to add a "blank" code in the QC for your bodygroup, so you will be able to turn on/off the effect.

_________________________________________________________________
Now the animated texture!
1- Create your animated texture to your liking, for the case of the "pyro overcharged" of Blaze, I have used After Effect with the free plugin "Saber"
Obviously, your texture have to use an alpha layer (so do not export it as a JPEG).
For the technical side, the perfect compromise between Vram consumption (in SFM), and quality of the texture is an animated texture resolution of 1024x1024 for a 6 sec duration with a frame rate of 30 FPS, obviously if you lower the FPS or duration, you will be able to increase the resolution and vice versa.
Once your texture is done, open GIMP and load all your animated texture, you can directly export your texture as VTF from there, Gimp might take some time to compile all the layer for the export (depending of your PC spec), once compiled Gimp will ask you choose some option for the VTF export.

Use the DXT5 format and don't forget to export as "Animation frames".
Here again, Gimp may take some time for the export, just let it work.
Congratz your texture is done but it's not over yet...
________________________________________________________________
The VMT code!
1- open your animated texture with VTFedit and generate a VMT, select as "base texture" AND "detail texture" your animated texture, as for the shader take "VertexlitGeneric"

And here the base code used...
In bold my personnal note to help you to understand the most important code.
"VertexlitGeneric"
{
"$basetexture" "models/sunchild/Blaze_SunChild_U/Overcharged"
"$detail" "models/sunchild/Blaze_SunChild_U/Overcharged"
"$alphatest" "1" *This is your transparency code to see the model through the alpha layer*
"$detailscale" "1"
"$detailblendfactor" "2.5"
"$detailblendmode" "5" *This will make the texture glow*
"$phong" "1"
"$PhongAlbedoTint" "1"
"$phongexponenttexture" "models/apocmodels/SonicGenerations/exponent"
"$phongexponent" "15"
"$phongboost" "5"
"$phongfresnelranges" "[.6 2 15]"
"$rimlight" "1"
"$rimlightexponent" "8"
"$rimlightboost" "0.2"
"$checkzero" "0"
"Proxies"
{
"AnimatedTexture"
{
"animatedtexturevar" "$detail"
"animatedtextureframenumvar" "$detailframe"
"animatedtextureframerate" "30"
}
*The whole "animated texture" part is obviously here to control the animation of your texture, use the same framerate as your texture*
"AnimatedTexture"
{
"animatedTextureVar" "$basetexture"
"animatedTextureFrameNumVar" "$frame"
"animatedTextureFrameRate" "30"
}
"TextureScroll"
{
"textureScrollVar" "$basetexturetransform"
"textureScrollRate" "0.20"
"textureScrollAngle" "-90"
}
*The Whole TextureScroll" part is here to displace your texture over the model, change and play with these setting to your licking, the value "textureScrollRate" and "textureScrollAngle" have to be the same between both part, in some case it is possible that you may not need to scroll the texture, remove the code if needed*
"TextureScroll"And it's finaly over o:
{
"textureScrollVar" "$detailtexturetransform"
"textureScrollRate" "0.20"
"textureScrollAngle" "-90"
}
}
Little bonus, here the updated Blaze model with the overcharged effect (bodygroup)
www.mediafire.com/?gko0e4mr72l…
This little trick should open to you a lot of possibility, here a little test run made in less than 10 min by using a simple sphere model...

Quick and dirty but you can see the kind of thing that you can do o:
SunChild Project - The Humans Case
Little extra journal entry for today but I guess it is time to clear the thing up and maybe on some of the things you might or not expect from this project. If you followed this project since a while, the first thing I'm gonna state will be obvious, but a little reminder will do no harm. SunChild is not at all a comedy, never was, and never will be, don't expect either the personification that the Sonic cast have since the "2010 era" SunChild plotline is directly linked to Sonic 06 event (a part of the series taking place right before 06 in the Sol Zone, then the rest right after it from Blaze perspective), therefore the cast will be in line with how they were depicted during that time. In overall, SunChild narrative intention is to deliver an action drama story, with each of the main cast having there own journey, there own challenge to overcome, and there own lesson to learn, with some of the cast having some dramaticaly opposed point of view on how the things should be done, and
SunChild Project - The long awaited news
Hello there :o It has been a while :p Before starting, I'm sorry for having running "silent" on DA for sooooo long, but I prefered to work in peace without feeling forced to feed my DA account with content, or worse, precisely work on asset susceptible to be showed while they were low in my priority list, but the wait is no over. YES, I'm still working on the SunChild project, and yes I'm finally getting closer of the end of the asset production work, asset production that I hope to have completely finished for December. But well, time to show stuff, right? So here we go! ----------------------------------------------------------------------------------------------------- Sol Capital city with the Imperial Palace This is currently one of the map which is conssuming most of my work time, part of SunChild will take place on the Sol Zone during the early days of Blaze. I obviously wanted something very "oriental" themed since the original inspiration that Sonic Team took when
SunChild Project - Dev Diary UE4
As promised, it's time for a rather big dev diary regarding the tech stuff produced so far for the SunChild series.
The first point is about fur, a real physical fur was always something that I wanted to try on Sonic cast character (and something which was not possible in SFM), I've tried several technic, the "shell" way which is shader based, it was looking good on some character (but not everyone) and this way has an huge drawbavk, the lack of native support for physicaly based animation.
So I've looked to the side of Nvidia and their HarWorks plugin, full succes, it's what I wanted, easy to setup, easy to edit on the fly, physical based a
Texture commission [OPEN]
Hello everyone !
I announce you today that I will start to officialy accept texture commission work (PBR and non-PBR workflow).
Base price will be in EURO, USD are accepted and will be converted directly from the price in EURO at the moment we are both (me and the customer) agree for the commission, payment method will be Paypal only
_________________________________________________
Full character texturing and/or full retexturing / remaking (fully remake and enhanced version of your original texture) / major alt variant editing
Base Price 35 EURO (PBR and non-PBR workflow)
+ extra option of 10 euro if you want me to build the material V
© 2016 - 2024 Nova-rek
Comments0
Join the community to add your comment. Already a deviant? Log In